This is an easy recipe for prawn lovers like me. It is delicious and a finger licking good dish that goes perfectly well with a bowl of hot rice. This is the kind of dish that I will never grow tired of =)
Ingredients
14 pieces of medium size prawn (clean, deveined, butterfly cut and pat dry)
20g minced garlic
4 tbs oil
20g water
25g oyster sauce
10g shaoxing wine
1 tsp sugar
5g sesame oil
5g julienne ginger
spring onion
Method
In a sauce pan, heat up 4tbs oil until very hot, pour it on your minced garlic, set aside
Add the water, oyster sauce, shoaxing wine, sugar and sesame oil together. Pour it into the minced garlic oil mixture.
Prepare a shallow dish, lay all the prawn on the dish, put some garlic sauce mixture on each prawn. You may pour the rest of the sauce on the dish if there are any leftover.
Place all the julienned ginger on top
Cover and steam at high heat for about 10 minutes or until the prawn are cooked. Do not overcook the prawn.
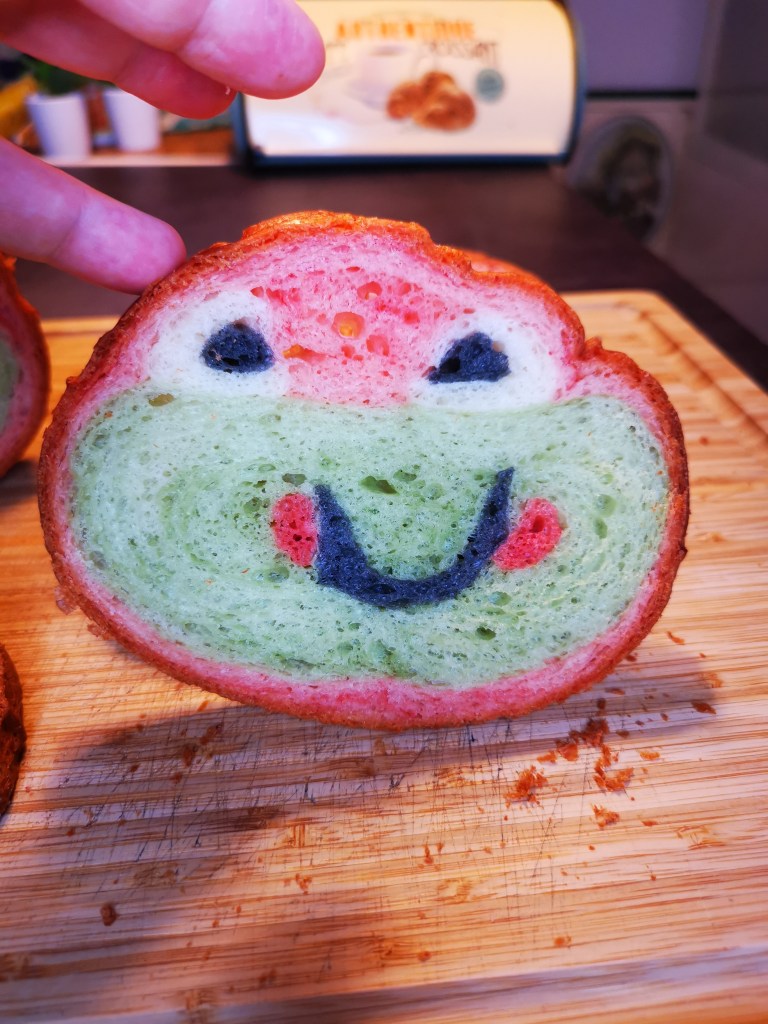
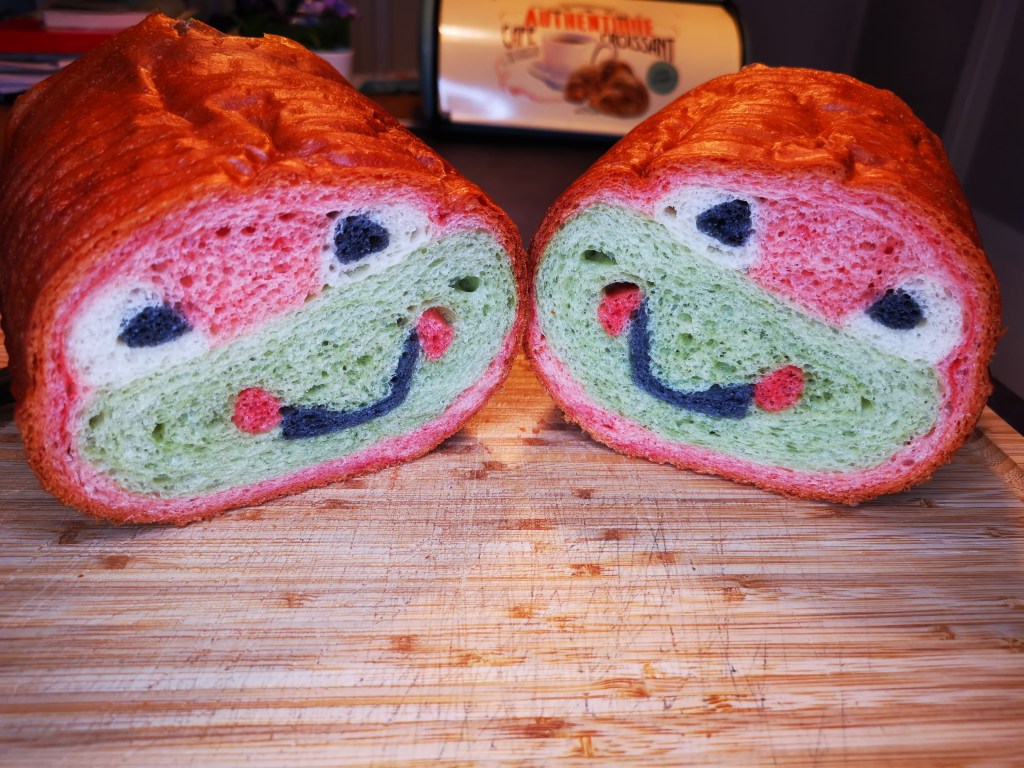
This is my second hidden image bread, the first one was the panda which I have shared the recipe and method earlier on. I was very excited while conceptualising how I was going to execute it as I am relatively new with this technique. I am not sure if I was going to be able to make it. I drew the design on a piece of paper and imagined how I was going to stack and envelope from one dough to another to make it really look like a frog. The weight of the dough of each part is important as one feature would be too big or too small. So I was praying when I was slicing the bread, hoping that an hour of work from conceptualising and assembling the dough did not go to a waste =). Glad that it turned out not to be so bad. So here I am, gladly sharing with you the steps. I will be happy to see your bakes, so please share it with me.=)
The recipe I used is still the same as my panda bread. However, I used a cylindrical bread tin which is slightly bigger. Therefore I need to make some adjustment to the total dough weight. Did you know that I bought this bread tin 6 years ago and this was the first time I used it. hahaha.
Ingredients
350g bread flour
4g instant active yeast
35g sugar
46g whipping cream
35g beaten egg
175g milk
25g butter
4g salt
Others
2g red yeast powder + 5g water (mix well)
2g green tea powder + 5g water (mix well)
1g charcoal powder + 3g water (mix well)
Non Stick cylindrical bread tin with internal size of 12 cm diameter x 23 cm length
Method
Preheat the oven at 180 degree celsius
Mix all the wet ingredients together (cream, full cream milk, beaten egg) then set aside
Add all bread flour, yeast, and sugar into the mixer followed by the wet ingredients
Use the dough hook to knead the dough at low speed. Knead until dough is formed
Add in the butter and knead for about 2 minutes at speed 2 ( low speed)
Add in the salt and continue to knead at speed 2. Knead until you reach window pane stage. This will take for about 15-17 minutes depending on your machine. I am using Kenwood ChefXL titanium.
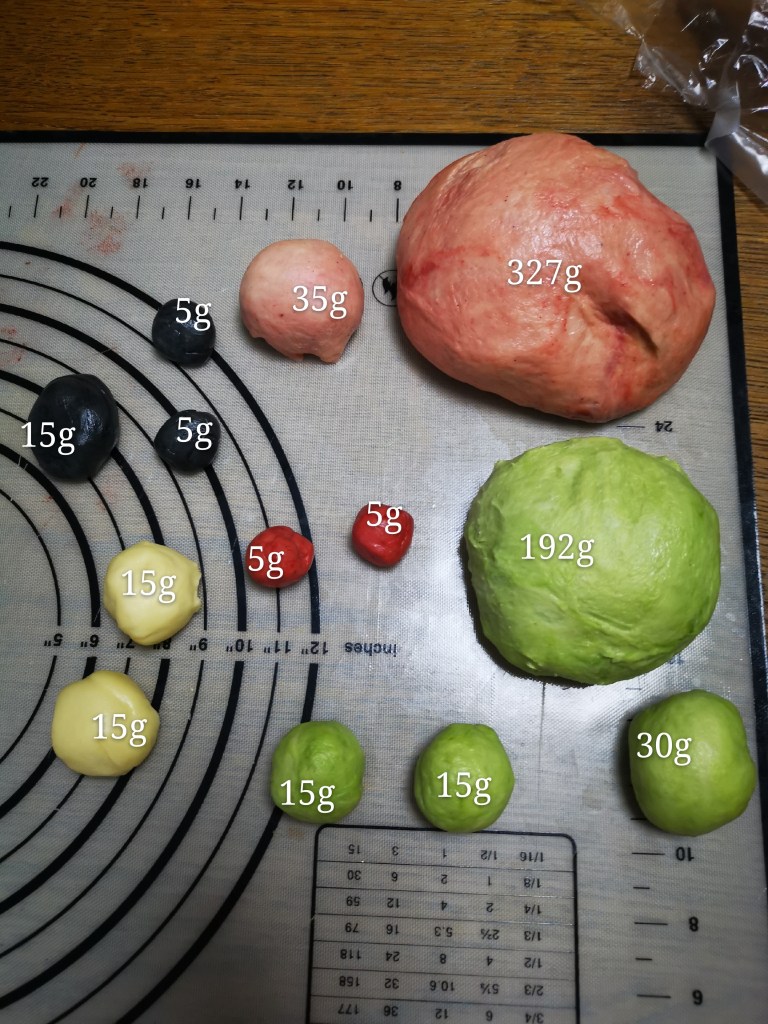
Divide the dough into 5 balls. 25g for the charcoal, 10g for the darker pink, 30g for the white dough, green is about 250g and the rest of the dough would be the lighter pink.
Add the colours to your dough and divide the dough accordingly based on the image below. The darker pink still uses the red yeast colour mixture, I just added more mixture into the dough to make it darker. Cover all the dough and let it rest for 20 minutes. Kindly note that the weights stated below are just a guideline. Your final dough weight might not exactly be the same as mine, as your processing loss would not be the same as mine. You might have a few grams extra or fewer grams lesser than mine =).
Roll your big green dough into a rectangular shape slightly smaller than your tin, about 19×11 cm. Roll the 30g green dough into a log and place it on the middle of your rectangular green dough. Roll the 15g black dough into rectangular shape, cover it on top of your 30g green dough. Refer to picture below.
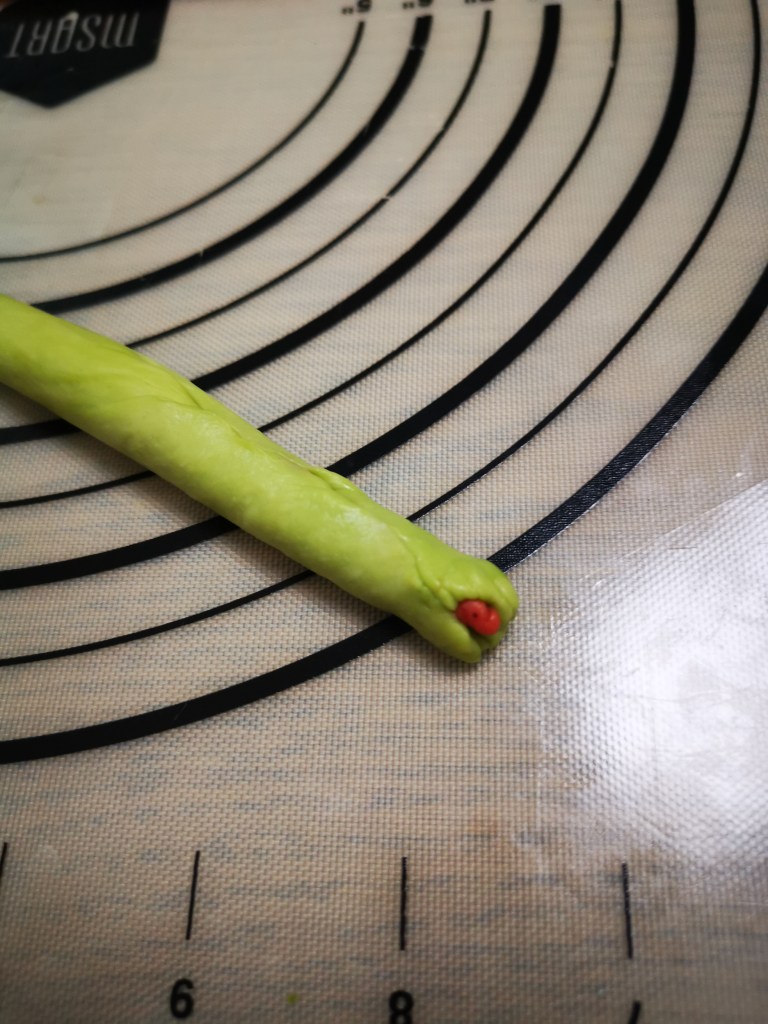
Roll the 5g darker pink dough into a log, then use the 15g green dough to wrap and seal it around. Refer to image below. Do the same for the other 5g darker pink dough and 15g green dough. These two logs will be the red cheeks of the frog
Place the two pink cheek logs on each side as shown on the image below
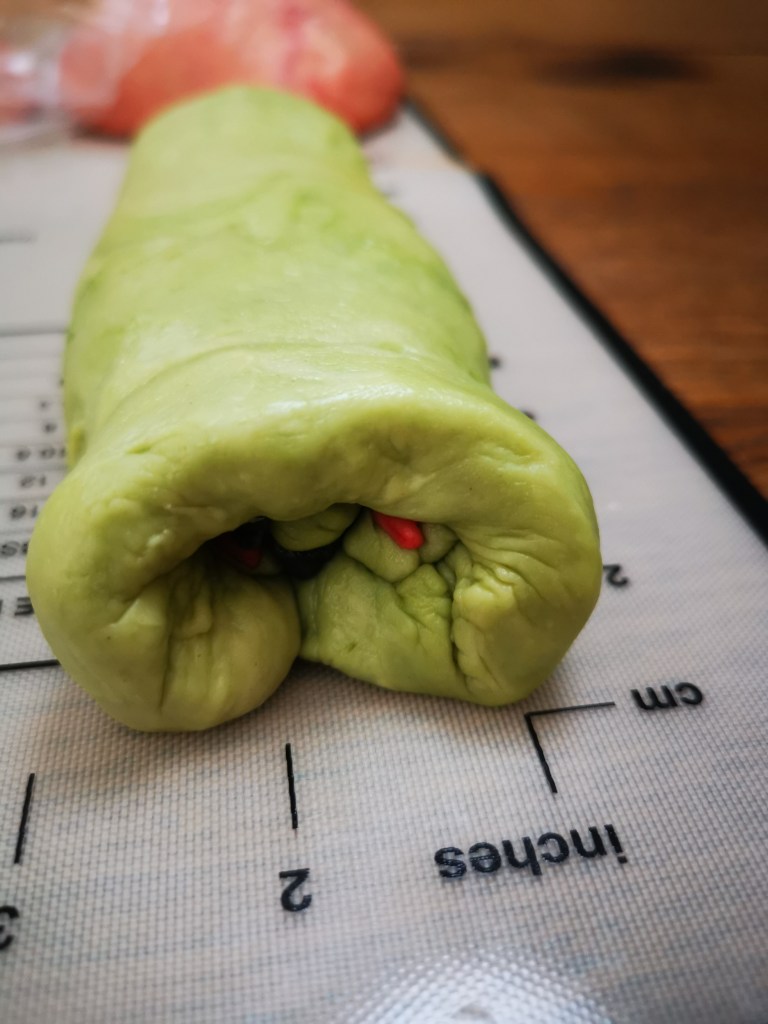
Wrap up the green dough and seal the edges. Flip the dough, seal below. Please refer to the image below.
Roll the small 5g black dough into a log, then use the 15g white dough to wrap and seal the black dough. Do the same to the other 5g black dough and 15g white dough. Put it on top of the green dough a little apart from one another. These two logs will be the eyes of the frog.
Looks like a blob fish lol. but it will look like a frog when baked =)
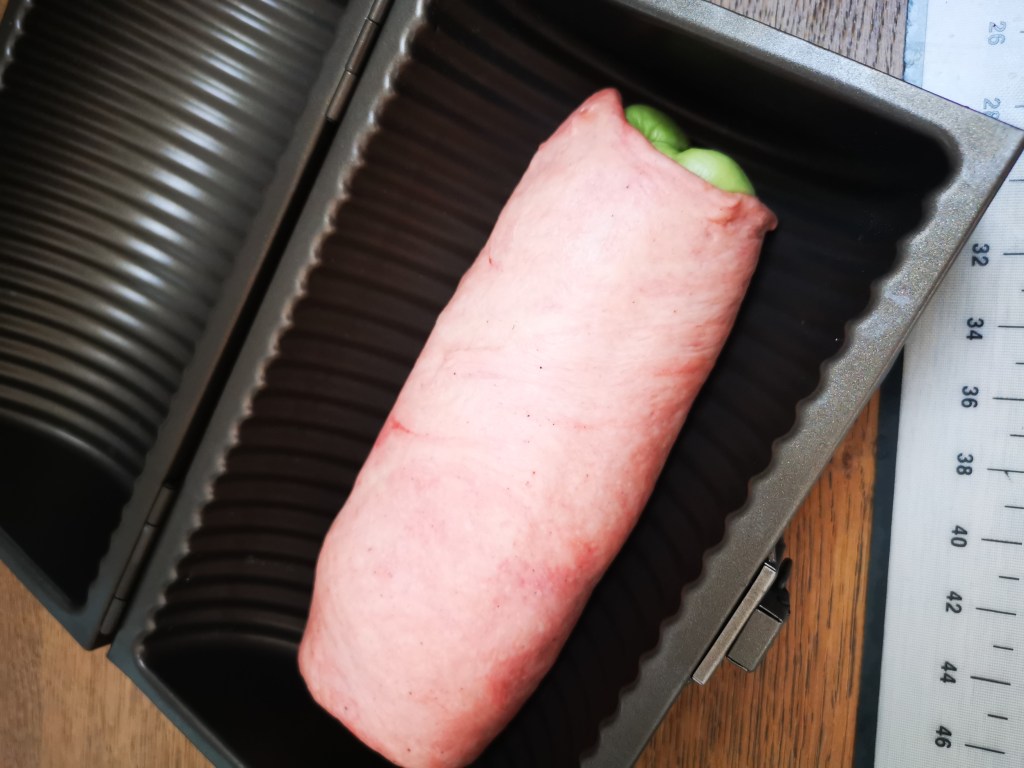
Roll the 35g light pink dough into a rectangular strip and place in the middle of the eye. Roll the biggest light pink dough into a rectangular shape twice the width of your green dough and place it on top of the green dough as shown on the image below
Flip the dough and seal the edges, tucking it tightly. Flip the dough again with the seal below before putting it in your bread tin.
Cover and let it rise until it almost reaches to the top about 80%. Slowly open the cover if you are going to take a peak to see how much your dough has risen. For me my dough has risen nicely at an hour and 45 minutes. (Kindly note that this is Singapore weather ) .
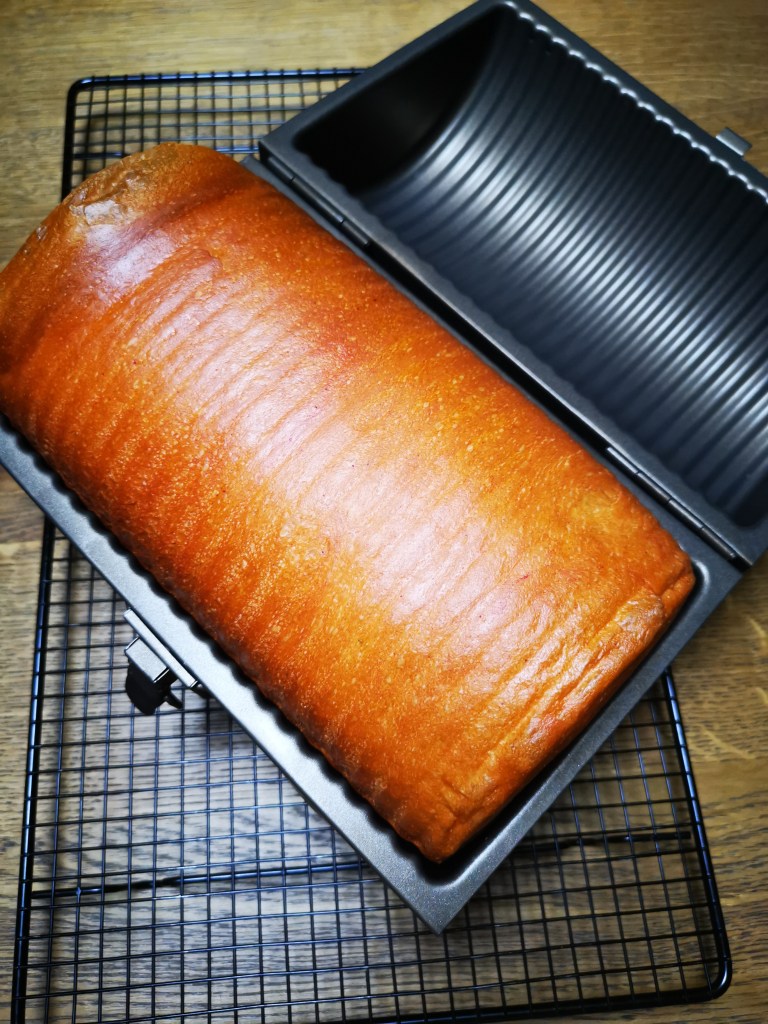
Bake for 40 minutes
Brush with butter and let it cool down on a wire rack.
Kindly follow the tin size if you are going to make this, as the dough proportion that I have taken into consideration was using this size of the bread tin.