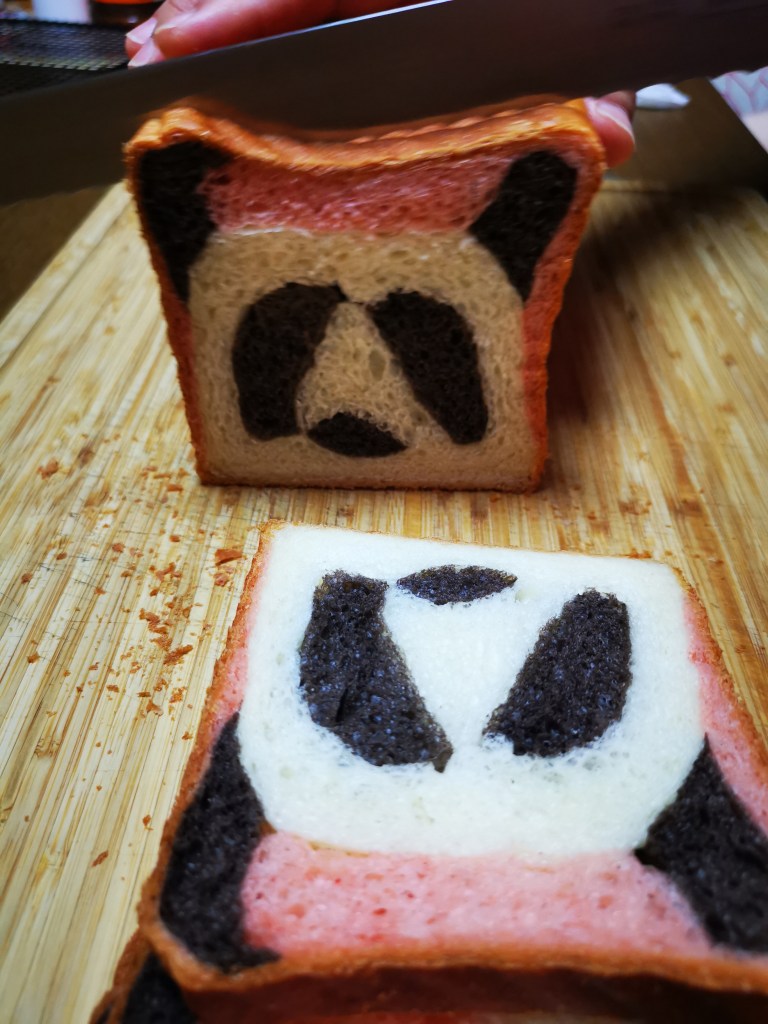
Hidden image in a bread has been in my to do list for so long. I came across of this idea when I was browsing Pinterest. One thing that caught my eye was the post of Bored Panda, where he talks about a Japanese mom who bakes bread loaf inspired by her kids drawings. I was totally blown away by her creativity. I told myself I want to try to do it one day. So here it is, but I think it would look better on a round tin rather than a rectangular tin. What do you think ?
The recipe I used is the same with my other blog, the pillowy soft milk bread. Only the method is different.
Ingredients
- 300g bread flour
- 3g instant active yeast
- 30g sugar
- 40g whipping cream
- 30g well beaten egg
- 150g full cream milk
- 20g butter (cut into small pieces)
- 3g salt
Others
- 2g black cocoa powder + 5g water ( Mix it well. You may also use charcoal powder)
- 2g red yeast powder + 5g water. (Mix it well. You may use strawberry powder or any colour your heart desires 😃)
Non- Stick Bread loaf Pan (19.5×10.3×11.3cm)
Method
- Preheat the oven at 180 degree celsius
- Mix all the wet ingredients together (cream, full cream milk, beaten egg) then set aside
- Add all bread flour, yeast, and sugar into the mixer followed by the wet ingredients
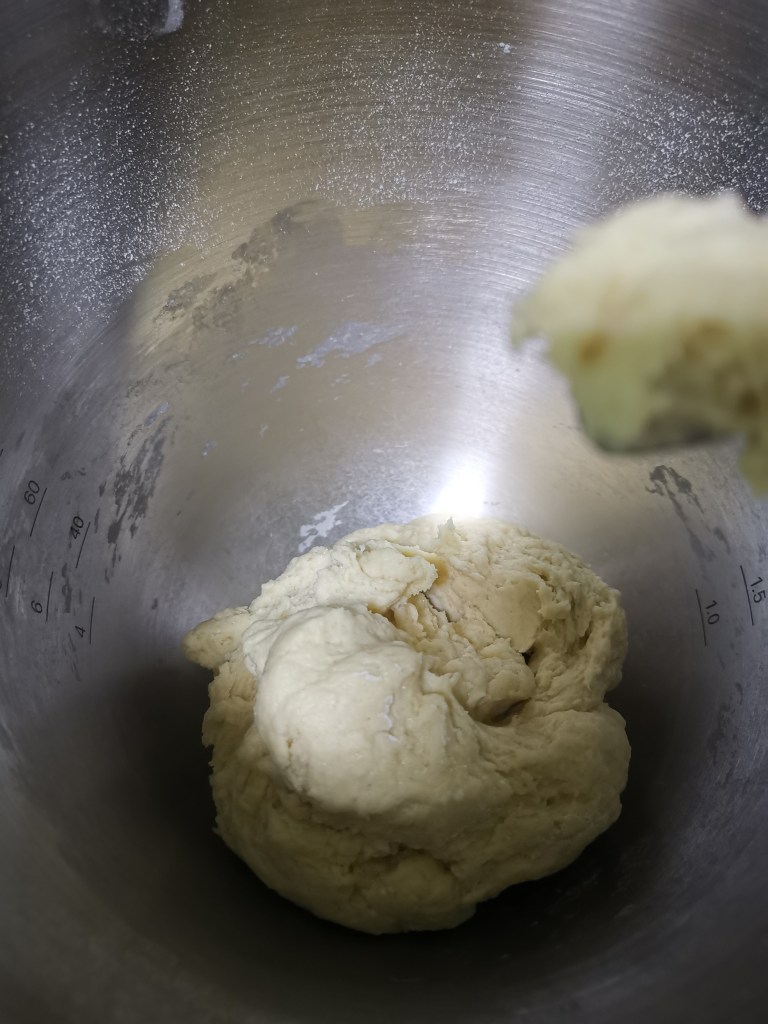
- Use the J hook to knead the dough at low speed. Knead until dough is formed
- Add in the butter and knead for about 2 minutes at speed 2 ( low speed)
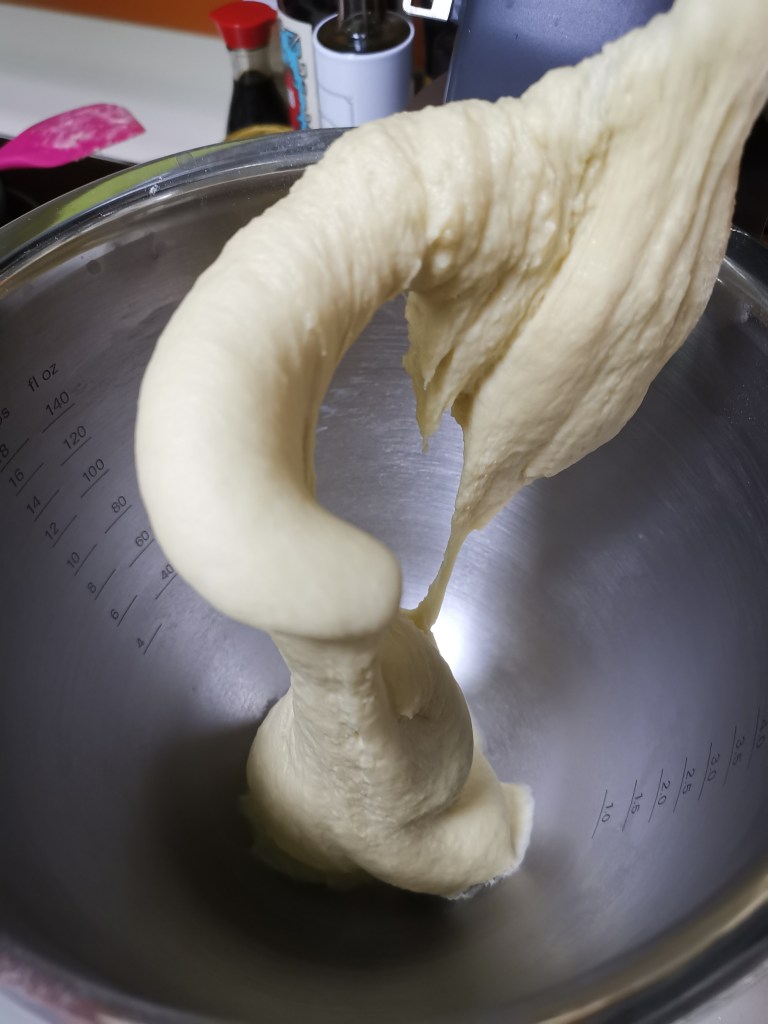
- Add in the salt and continue to knead at speed 2. Knead until you reach window pane stage. This will take for about 15-17 minutes depending on your machine. I am using Kenwood ChefXL titanium.
- Divide the dough into 3 balls. 140g for the cocoa, 240g for the white, the rest of the dough which is about 197g would be for the pink dough.
- Add the colours to your dough and divide the dough accordingly based on the image below. For the red yeast colour, I only use half of the mixture. It is up to you whether you want it darker shade or not. Cover and let it rest for 20 minutes. Kindly note that the weight stated below are just a guideline. Your final dough weight might not exactly be the same as mine, as your processing loss would not be the same as mine. You might have a few grams extra or fewer grams lesser than mine =).

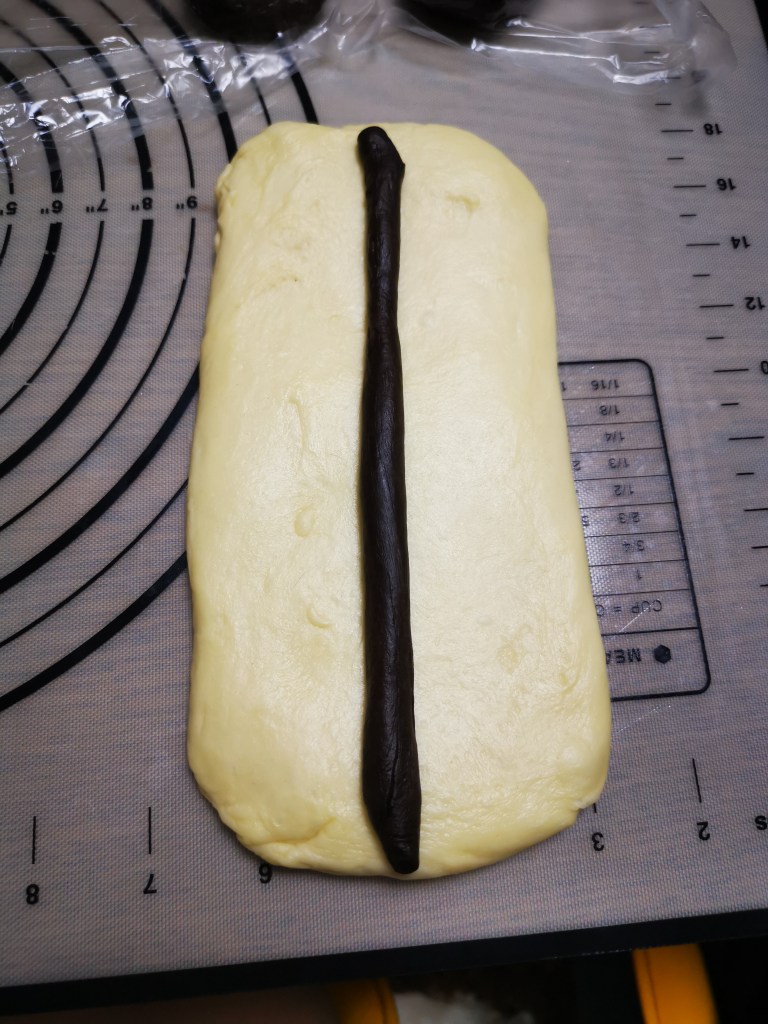
- Roll your 210g White dough into a rectangular shape a little less than the size of your bread tin. Approximately about 18×9 cm. Then roll the 13g cocoa dough thinly into a log. Roll your 30g white dough into a long rectangular shape, same length as your big white dough. Lay the cocoa dough in the middle on the big white dough, followed by the smaller white dough on top, enveloping the cocoa dough. Refer to image below.


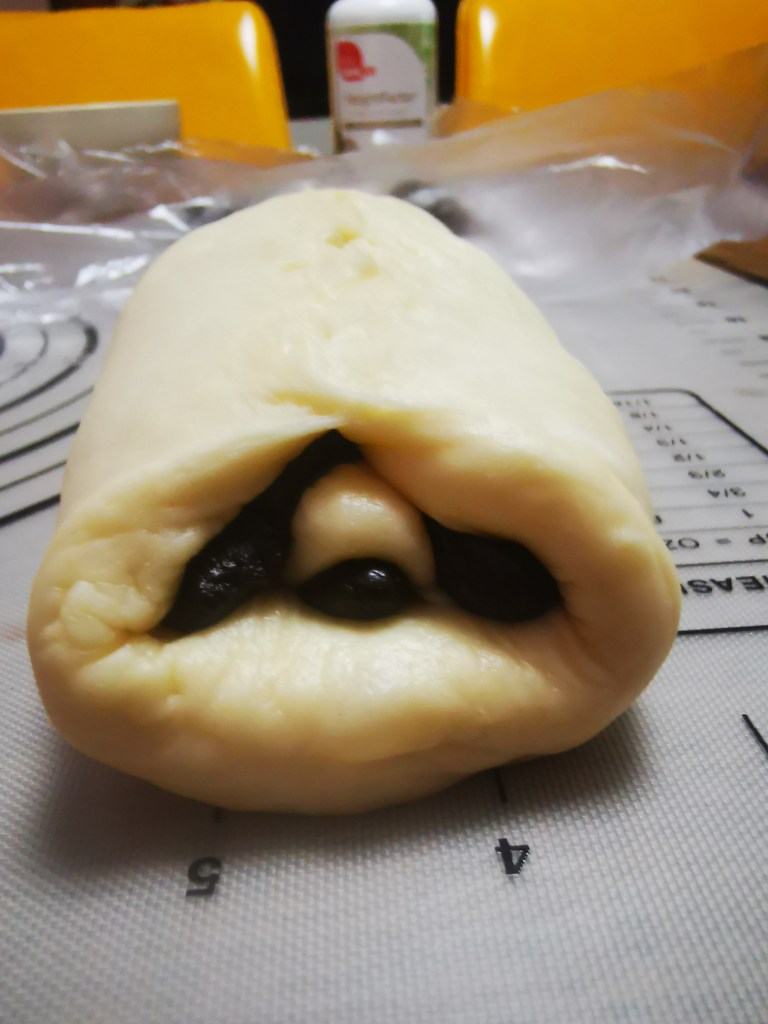
- Roll the two 35g cocoa dough into rectangular shape. These will be the eyes of the panda. Lay it on the sides of the smaller white dough. Refer to image below.

- Lift the two sides of the big loaf up and seal it up. Refer to image below.
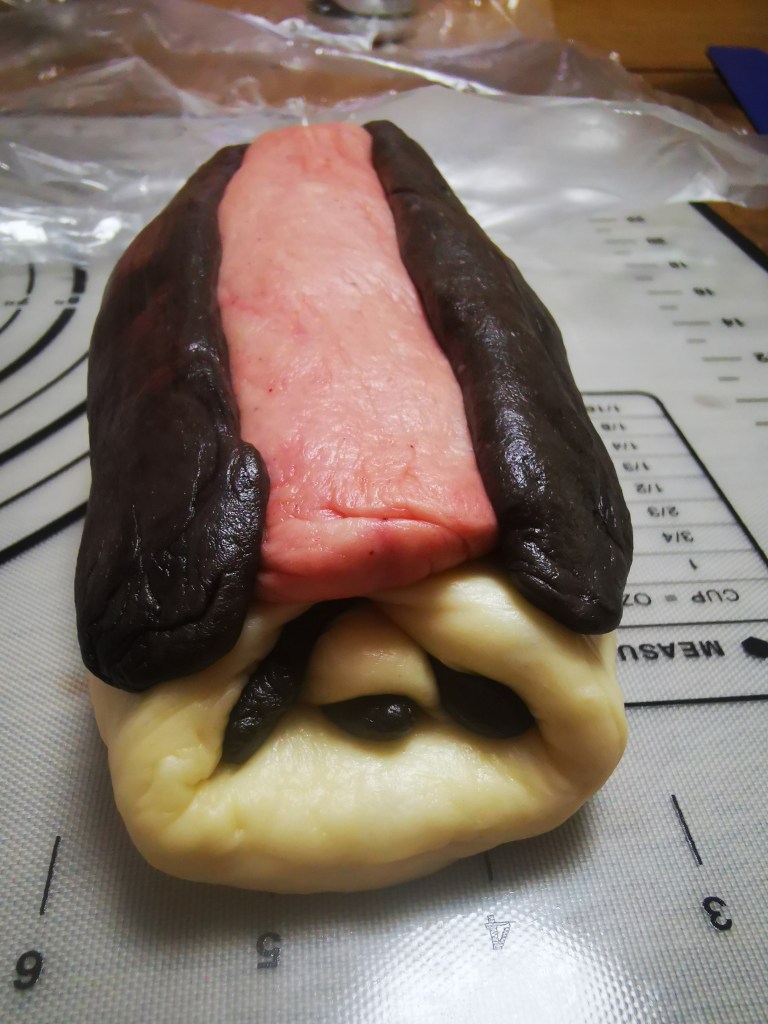
- Roll the smaller pink dough into a rectangular shape and stick it on the middle of assembled dough. Roll the other two 30g cocoa dough into rectangular shape and stick it on each side of the the small pink dough. Refer to image below.
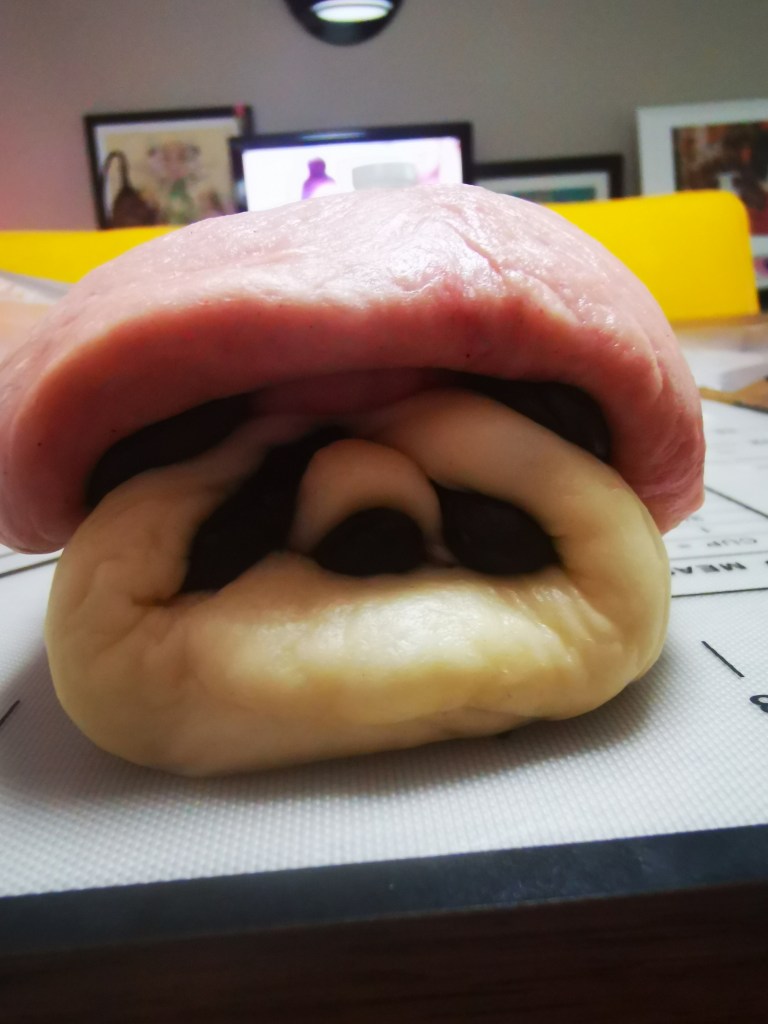
- Roll and flatten your last piece of dough, which is the big pink dough. The size should be about 18×9 cm. Place it on top of the assembled dough and roll the sides down and gently tighten the assembled dough using your palm.

- Gently put your dough into the tin box. Let it rise until it reaches about 90% of the container. Cover it with the lid and bake for about 35 minutes.


- Take out the bread from the tin, brush all sides with melted butter and let it cool down completely on a wire rack before slicing.